How to Automate Mobile App Distribution with CI/CD
You just finished a two-hour debugging session. The fix is merged, the build passes, and it's time to get the new APK to your testers. So you open your CI dashboard, download the artifact, log into your distribution platform, click through the upload wizard, type in the release notes, select the right app, the right group, and hit upload. Ten minutes of manual work for something that should have happened automatically when the build succeeded.
Now multiply that by every build, every day, across every branch your team works on. Manual distribution is a tax on your velocity. small enough to ignore on any single day, large enough to matter over weeks and months.
This guide covers how to automate mobile app distribution using TestApp.io's CLI tool (ta-cli) integrated with every major CI/CD platform. By the end, every successful build will be automatically distributed to your testers with zero manual intervention.
Why Automate Distribution?
Before diving into implementation, let's be explicit about what you gain:
- Speed. Builds reach testers in minutes after a merge, not hours after someone remembers to upload.
- Consistency. Every build is uploaded the same way with the same metadata. No missed release notes, no wrong app IDs, no "I uploaded the debug build by mistake."
- Traceability. Automated uploads include commit hashes, branch names, and build numbers. You always know exactly which code a tester is running.
- Reliability.
ta-cliuses resumable upload chunked uploads, which means large IPA and APK files don't fail halfway through on flaky CI network connections. Uploads resume from where they left off.
The overhead of setting this up is measured in minutes. The time savings compound over every build for the life of the project.
Meet ta-cli
ta-cli is TestApp.io's command-line tool for publishing builds. It runs on Linux, macOS, and Windows, and is designed specifically for CI/CD environments.
The basic command:
./ta-cli publish \
  --api_token=YOUR_API_TOKEN \
  --app_id=YOUR_APP_ID \
  --release_notes="Your release notes here" \
  --file=path/to/app.apk
Key Flags
| Flag | Description |
|---|---|
--api_token | Your TestApp.io API token. Always store this as a CI secret. never hardcode it. |
--app_id | The ID of the app in TestApp.io. Found in your app settings. |
--release_notes | Release notes for this build. Supports dynamic values from your CI environment. |
--file | Path to the build artifact. Supports APK, and IPA files. |
ta-cli automatically detects the file type and extracts metadata (version name, version code, bundle identifier) from the binary. You don't need to specify these manually.
resumable upload Chunked Uploads
Mobile build artifacts are large. An IPA file can easily be 100MB or more. APK files can be similarly hefty. Uploading these over CI/CD network connections, which can be throttled, shared, or occasionally unstable. is a reliability problem.
ta-cli solves this with resumable upload (resumable upload protocol) chunked uploads. The file is split into chunks and uploaded sequentially. If a chunk fails, only that chunk is retried, not the entire file. If the network drops and recovers, the upload resumes from the last successful chunk.
This is especially important for CI environments where you're paying per-minute for build time. A failed upload that has to restart from zero on a 15-minute timeout costs real money.
Platform-by-Platform Setup
Let's walk through setting up automated distribution on every major CI/CD platform. Each example assumes you've already configured your build pipeline to produce the artifact (APK, or IPA). We're adding the distribution step.
GitHub Actions
The most popular CI/CD platform for mobile teams. Use the official testappio/github-action@v5 action or call ta-cli directly in a run step.
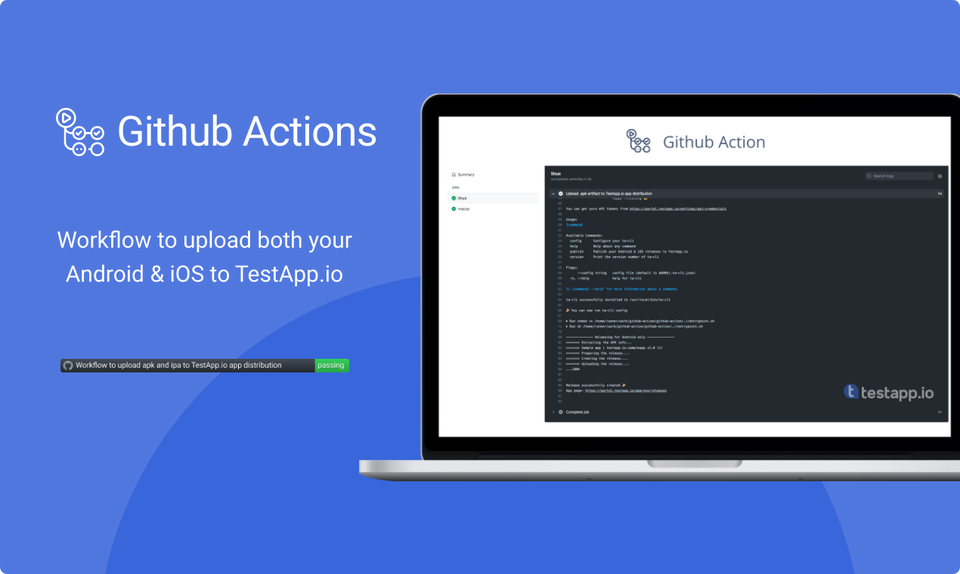
Full implementation: GitHub Actions setup guide
Bitrise
Bitrise has first-class support for iOS and Android builds. Add a Script step after your build step to call ta-cli.
Full implementation: Bitrise setup guide
CircleCI
CircleCI workflows use jobs and steps. Add ta-cli as a post-build step in your distribute job.
Full implementation: CircleCI setup guide
Fastlane
TestApp.io provides a dedicated Fastlane plugin. Add it to your Gemfile and call upload_to_testappio in your lane.
Full implementation: Fastlane setup guide
Jenkins
Jenkins pipelines use Groovy-based Jenkinsfiles. Add a ta-cli publish step in your post-build stage.
Full implementation: Jenkins setup guide
Xcode Cloud
Xcode Cloud uses custom post-build scripts. Create a ci_post_xcodebuild.sh script that calls ta-cli after a successful archive.
Full implementation: Xcode Cloud setup guide
GitLab CI/CD
GitLab CI uses .gitlab-ci.yml. Add a distribute stage that runs after your build stage.
Full implementation: GitLab CI/CD setup guide
Azure Pipelines
Azure Pipelines uses YAML or classic pipelines. Add a script task that downloads and runs ta-cli.
Full implementation: Azure Pipelines setup guide
Codemagic
Codemagic is built for Flutter and mobile. Add ta-cli to your post-build scripts in codemagic.yaml.
Full implementation: Codemagic setup guide
Travis CI
Travis CI runs builds in after_success hooks. Download ta-cli and publish your build artifact there.
Full implementation: Travis CI setup guide
Advanced Patterns
The examples above cover the basics. Here are patterns that make automated distribution even more useful.
Dynamic Release Notes from Commit Messages
Hardcoded release notes like "new build" aren't helpful for testers. Instead, generate release notes from your commit history:
# Get commits since last tag
RELEASE_NOTES=$(git log $(git describe --tags --abbrev=0)..HEAD --pretty=format:"- %s" 2>/dev/null || git log -10 --pretty=format:"- %s")

./ta-cli publish \
  --api_token="$TESTAPPIO_API_TOKEN" \
  --app_id="$TESTAPPIO_APP_ID" \
  --release_notes="$RELEASE_NOTES" \
  --file=app-release.apk
This gives testers a clear list of what changed in each build, making their testing more targeted and effective.
Branch-Based Distribution
Different branches often mean different testing contexts. You might want different app IDs or release notes depending on the branch:
# GitHub Actions example
- name: Upload to TestApp.io
  run: |
    curl -Ls https://github.com/testappio/cli/releases/latest/download/ta-cli-Linux-x86_64 -o ta-cli
    chmod +x ta-cli

    if [ "${{ github.ref_name }}" = "main" ]; then
      APP_ID="${{ secrets.TESTAPPIO_APP_ID_PRODUCTION }}"
      NOTES="Release candidate from main - ${{ github.sha }}"
    else
      APP_ID="${{ secrets.TESTAPPIO_APP_ID_DEV }}"
      NOTES="Dev build from ${{ github.ref_name }} - ${{ github.sha }}"
    fi

    ./ta-cli publish \
      --api_token=${{ secrets.TESTAPPIO_API_TOKEN }} \
      --app_id="$APP_ID" \
      --release_notes="$NOTES" \
      --file=app/build/outputs/apk/release/app-release.apk
Connecting CI Uploads to Version Lifecycle
Automated uploads become even more powerful when connected to TestApp.io's version lifecycle. Builds uploaded via CI automatically appear in the version's Releases tab, giving you:
- A chronological record of every build produced during a version's lifecycle.
- Direct install links for testers, no digging through CI artifacts.
- Linkage between builds, tasks, and blockers within the version context.
- Quality metrics that aggregate across all builds in a version.
When a tester reports a blocker from a CI-uploaded build, it's automatically linked to that build. When a developer pushes a fix and CI uploads a new build, the tester can immediately install and verify. The entire loop �� build, distribute, test, report, fix, rebuild, verify. happens without manual intervention.
Security Best Practices
A few reminders for keeping your CI/CD distribution pipeline secure:
- Never hardcode API tokens. Always use your CI platform's secret management. Every platform listed above supports encrypted environment variables or credential stores.
- Use separate tokens for CI and human access. If a CI token is compromised, you can rotate it without affecting your team's personal access.
- Restrict branch triggers. Don't automatically distribute builds from every feature branch. Limit automated distribution to branches that matter. typically
main,develop, andrelease/*. - Review CI logs. Ensure your CI configuration doesn't echo API tokens in build logs. Most CI platforms mask secrets automatically, but verify this for your setup.
Troubleshooting Common Issues
| Issue | Cause | Solution |
|---|---|---|
| Upload fails with auth error | Invalid or expired API token | Regenerate token in TestApp.io settings and update CI secrets |
| "File not found" error | Build artifact path is wrong | Check your build output directory. Gradle, Xcode, and Flutter all use different paths |
| Upload hangs or times out | Large file on slow connection | resumable upload chunked upload should handle this, but check your CI runner's network and any proxy settings |
| Wrong app or version | Incorrect app ID | Verify the app ID in your TestApp.io app settings matches your CI secret |
| Release notes are empty | Environment variable not resolved | Ensure your CI syntax for variable interpolation is correct for the platform |
Wrapping Up
Automating mobile app distribution with CI/CD is one of those investments that pays off immediately. The first time a build is automatically uploaded, distributed, and available for testing within minutes of a merge, with proper release notes, metadata, and version linkage. you'll wonder why you ever did it manually.
The setup is straightforward regardless of your CI platform. Download ta-cli, add your credentials as secrets, and add the publish command after your build step. resumable upload chunked uploads handle the reliability, metadata extraction handles the details, and version lifecycle integration handles the traceability.
Start with one pipeline, prove the value, and expand from there.
Get started with TestApp.io and connect your first CI/CD pipeline today. For platform-specific setup details, check the help center.